Is it possible to control your smart home devices, monitor industrial machinery, or access sensitive data from anywhere in the world without paying a premium? The answer is a resounding yes, and it's all thanks to the power of remote IoT management using a Raspberry Pi.
The relentless march of technology has woven the Internet of Things (IoT) into the very fabric of modern life. From the comfort of our smart homes to the bustling efficiency of industrial operations, IoT devices are constantly reshaping how we interact with our surroundings. However, the convenience of these connected devices often comes with a logistical challenge: how do you manage them remotely, especially when navigating the complexities of routers and firewalls? This is where the marriage of Raspberry Pi and ingenuity comes into play.
This article aims to provide a comprehensive guide to setting up remote IoT behind a router using a Raspberry Pi, entirely free of charge. By meticulously following the steps and strategies outlined, you'll gain the knowledge, confidence, and practical skills required to establish a seamless and secure remote IoT experience. Get ready to unlock a new level of control and efficiency.
- Who Is Vanessa Salcido Inside Andrew Vanwyngardens Marriage
- Movierulz Hd Bar Unveiling Features Risks Alternatives Streaming Guide
| Feature | Details |
|---|---|
| Understanding Remote IoT | The core concept involves connecting IoT devices to a network and managing them from a distance, even when behind a router or firewall. This is crucial for home automation, remote monitoring, and industrial applications. |
| Why Use Raspberry Pi? | The Raspberry Pi offers low power consumption, open-source software support, a wide and supportive community, and compatibility with various sensors and devices, making it ideal for IoT projects. |
| Key Benefits | Enhanced accessibility, improved efficiency, cost savings, and flexibility in device management are the primary advantages. |
| Example Use Cases | Remote control of home appliances, monitoring environmental conditions (temperature, humidity), and accessing data from remote sensors. |
| Reference | Raspberry Pi Foundation Official Website |
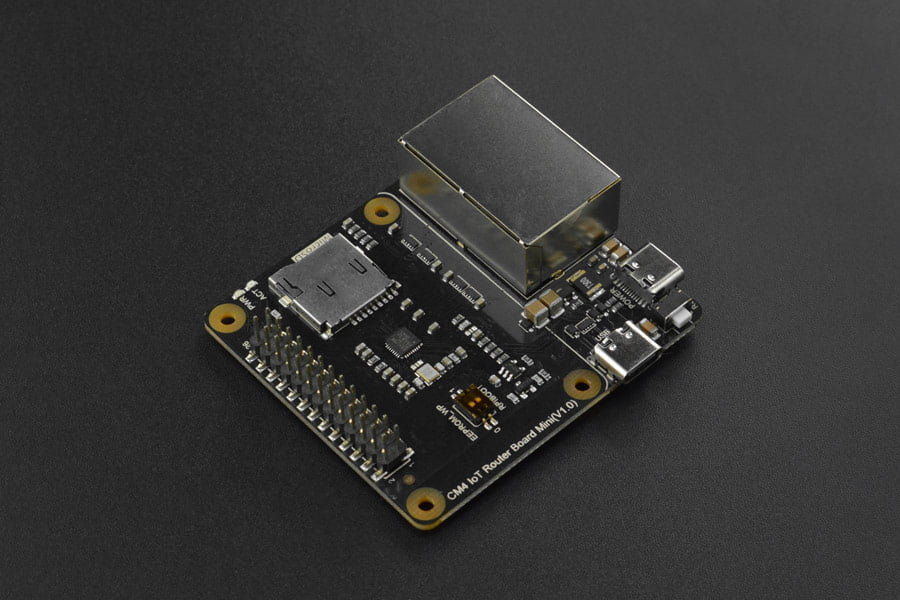
The Raspberry Pi, a marvel of miniaturization and affordability, represents the cornerstone of this endeavor. Developed by the Raspberry Pi Foundation, these small single-board computers have become a global phenomenon, embraced by hobbyists, educators, and professionals alike. Their popularity stems from a combination of factors: cost-effectiveness, versatility, and a vibrant, supportive community.
Choosing the Right Raspberry Pi Model
Selecting the appropriate Raspberry Pi model is a critical first step. Consider the following when making your choice:
- Processing Power: How demanding are the tasks your IoT devices will require? A Pi 4 or later offers significantly more processing power than earlier models.
- Memory Capacity: The amount of RAM (Random Access Memory) impacts performance, particularly when running multiple applications simultaneously.
- Connectivity Options: Consider the number of USB ports, Ethernet port, and Wi-Fi capabilities.
- Compatibility with Peripherals: Ensure the chosen model supports the peripherals you intend to use, such as sensors, cameras, and displays.
Essential Accessories
To embark on your remote IoT journey, you'll need the following accessories:
- Dennis Tissington Verdict Key Insights Legal Impact
- Hdhub4u 2025 Your Ultimate Streaming Guide Review
- MicroSD Card: This stores the operating system and all your project files. Choose a reliable card with sufficient storage capacity.
- Power Supply: A stable power supply is crucial for the proper functioning of your Raspberry Pi. Make sure it provides the correct voltage and current.
- Case: A case protects your Raspberry Pi from physical damage and helps with heat dissipation.
- Keyboard and Mouse (Optional): These are necessary for initial setup and configuration, but can often be removed once the system is operational.
Now, let's delve into the practical steps of setting up your Raspberry Pi for IoT. The process involves installing the operating system, configuring the network, and connecting your IoT devices.
Installing the Operating System
The foundation of your setup is the operating system. Follow these steps:
- Download the Raspberry Pi OS: Obtain the latest version from the official Raspberry Pi website.
- Flash the OS to your MicroSD card: Use a dedicated flashing tool like Balena Etcher. This process writes the operating system image onto the card, making it bootable.
- Insert the MicroSD card: Place the card into your Raspberry Pi.
- Power on your Raspberry Pi: Connect the power supply. The device should start booting up, with the OS loading from the microSD card.
Configuring the Network
A stable network connection is paramount for remote access. Here's how to configure it:
- Connect to your router: Use an Ethernet cable for a reliable wired connection, or connect via Wi-Fi.
- Configure network settings: Access the network configuration through the Raspberry Pi OS interface.
- Static IP Address (Recommended): Assign a static IP address to your Raspberry Pi within your router's settings. This ensures the IP address doesn't change, simplifying remote access. You can do this in your router's admin panel by reserving an IP address for your Pi's MAC address.
Once your Raspberry Pi is up and running on your network, the next step is to configure it for remote access. This involves navigating the complexities of network configuration to ensure you can manage your IoT devices from anywhere in the world.
Port Forwarding
Port forwarding is the key to allowing external access to your Raspberry Pi. Here's how it works:
- Understand the concept: Port forwarding directs incoming network traffic from a specific port on your router to your Raspberry Pi's internal IP address and port.
- Access your router's admin panel: Log in to your router's settings. The specific method will vary based on your router's make and model. Consult your router's documentation for specific instructions. The default IP address to access this is typically 192.168.1.1 or 192.168.0.1.
- Locate port forwarding settings: Find the port forwarding or virtual server section.
- Configure the settings: Specify the port number, the protocol (TCP or UDP), your Raspberry Pi's internal IP address, and the same port number for the internal port. For example, if you want to access your Raspberry Pi via SSH (Secure Shell), you would forward port 22 (default SSH port).
- Save your settings: Apply the changes and restart your router if necessary.
Dynamic DNS (DDNS)
Internet Service Providers (ISPs) frequently assign dynamic IP addresses, which change periodically. DDNS services resolve this issue:
- The Problem: If your IP address changes, you won't be able to connect to your Raspberry Pi using the old IP address.
- The Solution: DDNS services provide a hostname that always points to your current IP address.
- Choose a DDNS provider: Popular providers include No-IP, DuckDNS, and DynDNS.
- Sign up for an account: Create a free or paid account with your chosen provider.
- Configure your router (or the Raspberry Pi): Many routers have built-in DDNS configuration options. If your router doesn't, install a DDNS client on your Raspberry Pi.
- Update your hostname: The DDNS client will automatically update your hostname with your current IP address, ensuring you can always access your Raspberry Pi using the same domain name.
With network configuration complete, security becomes the next critical consideration. Securing your remote IoT setup is not merely a suggestion; it's an absolute necessity.
Security Considerations
Securing your remote IoT setup is paramount. Consider the following security measures:
- Strong Passwords: Use strong, unique passwords for all accounts on your Raspberry Pi and router. Avoid easily guessable passwords, and change them regularly.
- Encryption: Enable encryption for all communications. For example, use SSH for secure remote access and HTTPS for web interfaces.
- Regular Software Updates: Keep your Raspberry Pi's operating system and all software up to date. Updates often include security patches that address vulnerabilities. Configure automatic updates where appropriate.
- Monitor System Logs: Regularly review system logs for any suspicious activity. This can help you identify and respond to potential security breaches. Tools like `fail2ban` can automatically ban IP addresses that attempt to brute-force your login credentials.
Firewall Configuration
A firewall acts as a barrier, controlling network traffic. Configure your firewall to enhance security:
- Choose a firewall tool: `ufw` (Uncomplicated Firewall) is an excellent choice for ease of use. It provides a user-friendly interface for managing firewall rules.
- Install ufw: Install it using the command `sudo apt update && sudo apt install ufw`.
- Configure rules: Allow only necessary traffic. For example, if you want to access your Raspberry Pi via SSH, allow traffic on port 22. Block all other incoming traffic by default.
- Enable the firewall: Use the command `sudo ufw enable`.
- Example commands: `sudo ufw allow ssh` (allows SSH traffic), `sudo ufw deny 80` (denies HTTP traffic).
With security measures in place, you're now ready to explore the range of software options that simplify the management of your IoT devices. A central hub is crucial to control and visualize data from all your smart devices.
Software Options for IoT Management
Several software solutions are available. Here are a few popular options:
- Home Assistant: An open-source home automation platform, ideal for controlling and monitoring IoT devices from a centralized interface.
- Node-RED: A flow-based programming tool that simplifies connecting IoT devices. It offers a user-friendly interface and is easily integrated with Raspberry Pi.
- MQTT: A lightweight messaging protocol, used for communication between IoT devices and a central server.
Home Assistant
Home Assistant is a versatile platform for home automation:
- Centralized Control: It provides a single interface for managing various IoT devices, including lights, sensors, and appliances.
- User-Friendly Interface: It has a clean and intuitive web interface.
- Wide Compatibility: It supports a vast array of devices and integrations.
- Installation: Can be installed directly on Raspberry Pi using the Home Assistant image or via Docker.
Node-RED
Node-RED offers a visual, flow-based programming approach:
- Flow-Based Programming: Drag-and-drop interface to create workflows that connect devices and services.
- Easy Integration: Simplifies the integration of various IoT devices.
- Customization: Allows you to create custom dashboards and automations.
- Installation: Easily installed on Raspberry Pi using the `apt` package manager.
Even with the best-laid plans, encountering problems is a part of the process. Lets look at troubleshooting tips.
Troubleshooting Tips
When encountering problems, the following steps may help:
- Check Network Connectivity: Verify your Raspberry Pi's network connection. Ping the device from another device on your network. Ensure the router is correctly configured and the internet is working.
- Verify Port Forwarding Settings: Double-check your port forwarding configuration in your router's admin panel. Confirm that the correct ports are forwarded to the Raspberry Pi's internal IP address.
- Ensure Software Updates: Keep your software updated. Run updates regularly to address potential bugs and security flaws.
- Consult Community Forums: Online communities offer a wealth of knowledge and support. Search for solutions to your problems in online forums and communities, such as the Raspberry Pi forums and the forums specific to your chosen IoT software.
Common Issues and Solutions
Here are some common issues and their solutions:
- Unable to Connect: Restart both the router and the Raspberry Pi. Check your port forwarding settings. Verify that your DDNS hostname is correctly configured and pointing to your current IP address.
- Slow Performance: Optimize the software you are running and reduce unnecessary background processes. Make sure your microSD card is fast enough, as a slow card can significantly impact performance. Consider a faster Raspberry Pi model if necessary.
- Security Alerts: Review your firewall and encryption settings. Ensure you're using strong passwords. Investigate any suspicious activity in your system logs. Consider implementing intrusion detection systems.
Now, let's examine how to implement this system cost-effectively.
Cost-Effective Solutions
You can implement remote IoT with Raspberry Pi without significant costs. Leveraging free software and open-source tools makes this possible.
- Free Software Options: Raspberry Pi OS, Home Assistant, and Node-RED are all free and open source.
- Open-Source Communities: Participate in open-source communities to access resources, tutorials, and support. This helps to find valuable expertise and guidance for your IoT projects.
- Hardware: Reuse existing hardware components. If you have an old network cable, case, or peripherals, consider using them.
- Cloud Services: If you wish to expand your capability, consider using limited-time free cloud services or the free tiers of cloud services for non-commercial use.
Looking to the future, the field of remote IoT with Raspberry Pi is poised for continued growth. Advancements and the increasing demand for smart solutions are expected to drive innovation. Stay updated and informed to maximize the potential of your IoT projects.
Emerging Technologies
Keep an eye on the following emerging technologies that are likely to influence the field:
- 5G Networks: Faster and more reliable data transmission will enhance the performance of IoT devices.
- Edge Computing: Processing data closer to the source (e.g., on the Raspberry Pi) will improve efficiency and reduce latency.
- Artificial Intelligence: The integration of AI will lead to more intelligent and autonomous IoT systems.
- Unveiling Shivon Zilis Tech Leader Jewish Heritage Your Publication Name
- Breaking Lisa Desjardins Illness A Health Update Amp Her Journey