In an era defined by the relentless expansion of the Internet of Things, can you truly afford to overlook the importance of secure, remote access to your IoT devices? The ability to remotely manage and control your Raspberry Pi devices, coupled with robust security measures, is no longer a luxury but an essential skill for modern tech enthusiasts and professionals.
The evolution of technology has brought forth the need to remotely manage and monitor IoT devices, with security being of paramount importance. Secure Shell (SSH) tunnels combined with Virtual Private Cloud (VPC) configurations offer a strong foundation to ensure data protection while granting seamless access. This guide presents a detailed walkthrough, designed to guide you through the entire process, from downloading the necessary software to configuring everything you need to establish a secure connection to your Raspberry Pi.
With the surge in popularity of Raspberry Pi and its integration into IoT projects, the need for secure remote access has reached unprecedented levels. The following table provides a concise overview of the key technologies and their applications within this setup:
- Movierulz In 2024 Is It Still Worth It Features Risks Alternatives
- Dennis Tissington Verdict Key Insights Legal Impact
| Technology | Description | Application |
|---|---|---|
| Virtual Private Cloud (VPC) | A logically isolated section of a cloud environment that provides secure and controlled access to resources. | Securing the network and isolating the Raspberry Pi from public networks. |
| Secure Shell (SSH) | A network protocol providing encrypted communication between devices. | Establishing a secure channel for remote access and management. |
| Raspberry Pi | A compact, affordable single-board computer. | Serving as the IoT device to be remotely accessed and managed. |
| Windows 10 | The operating system used for accessing the Raspberry Pi remotely. | The environment from which remote access is initiated. |
For further in-depth information, please consult the official Raspberry Pi documentation: Raspberry Pi Official Website
RemoteIoT VPC SSH Raspberry Pi represents a formidable combination of technologies crafted to enable secure remote access to your IoT devices. By combining Virtual Private Clouds (VPCs) with Secure Shell (SSH), users gain the ability to connect to their Raspberry Pi devices from anywhere around the globe, all while upholding stringent levels of security. This setup offers unparalleled convenience and peace of mind, allowing you to manage your devices without the need for physical presence.
The capability to remotely manage your IoT devices saves valuable time and resources. Whether you are configuring a home automation system or developing an industrial IoT solution, understanding how to set up VPC SSH connections is critical. This guide will provide a thorough overview of the tools and steps required to accomplish this goal.
- Hdhub4uin Your Guide To Movie Streaming Entertainment In 2024
- Jersey Jons American Pickers Leg A Collectors Guide
A Virtual Private Cloud (VPC) acts as a logically isolated section within a cloud environment, offering secure and controlled access to resources. VPCs are frequently utilized in enterprise settings to segment networks and safeguard sensitive data. By integrating VPC with SSH for Raspberry Pi, users can establish a secure tunnel for remote access. This approach adds an essential layer of protection to your IoT projects.
Key Advantages of Employing a VPC
- Enhanced security through network segmentation: This is the core benefit, isolating your Raspberry Pi and the traffic to and from it from the broader internet.
- Controlled access to resources: You dictate who can connect and what they can do, limiting the attack surface.
- Scalability for growing IoT projects: As your project expands, a VPC can easily accommodate more devices and resources.
- Compatibility with cloud-based services: VPCs seamlessly integrate with various cloud services, expanding the functionality of your IoT setup.
Utilizing a VPC guarantees that your Raspberry Pi remains isolated from public networks, thereby mitigating the risk of unauthorized access. This is especially crucial for projects involving sensitive data or critical infrastructure, where any security breach could have significant consequences.
The Raspberry Pi is a compact, affordable, and versatile single-board computer designed for a wide array of applications, from educational projects to industrial automation. Its versatility and ease of use make it a favored choice among IoT enthusiasts and professionals.
Defining Characteristics of Raspberry Pi
- Low power consumption: Ideal for projects requiring prolonged operation.
- Support for multiple operating systems: Providing flexibility in software choices.
- Extensive community support and resources: A vast online community and readily available documentation make it easier to troubleshoot and find solutions.
- Compatibility with a wide range of sensors and peripherals: Enabling a wide range of projects and applications.
The Raspberry Pi's ability to connect to the internet and communicate with other devices makes it an ideal platform for IoT projects. Pairing it with VPC SSH unlocks its full potential for remote management, providing users with secure and reliable control over their devices.
Secure Shell (SSH) is a network protocol that ensures secure and encrypted communication between devices. It's a cornerstone for safe remote access to servers and IoT devices. Understanding the fundamentals of SSH is paramount when setting up a RemoteIoT VPC SSH Raspberry Pi connection.
Core Components of SSH
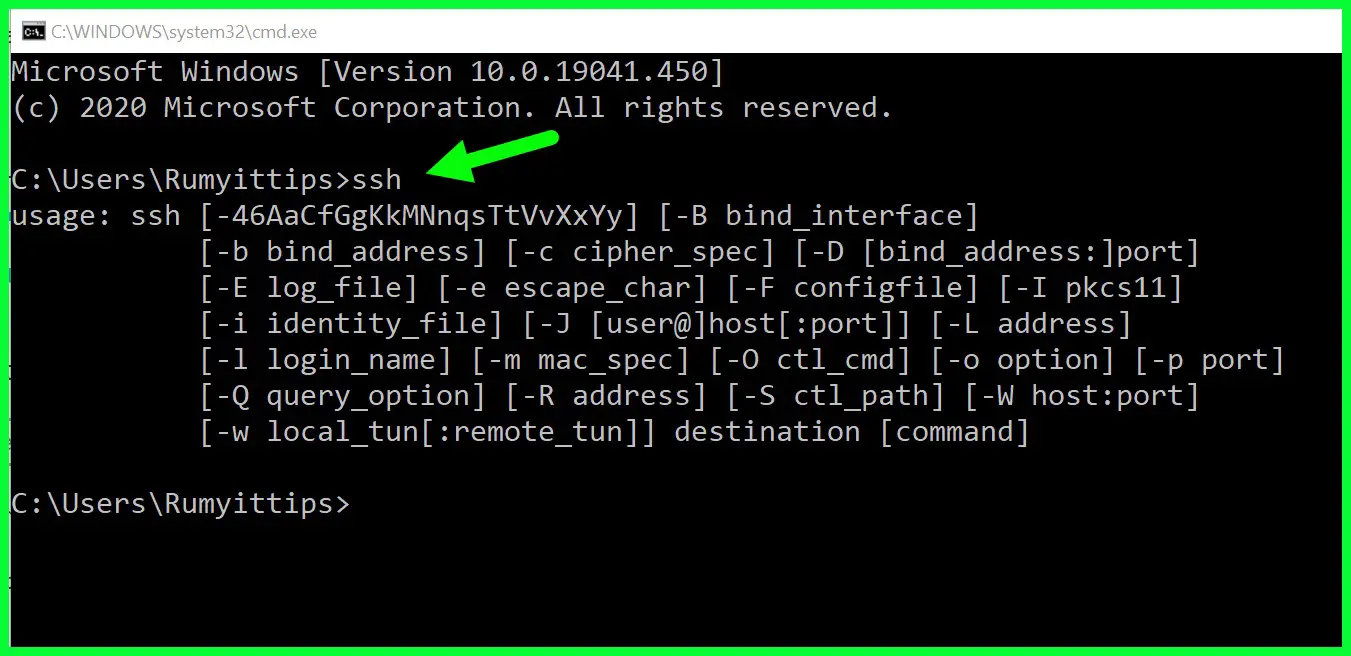
- SSH client: The software used to initiate connections, such as PuTTY or the OpenSSH client available on Windows.
- SSH server: The software running on the target device (Raspberry Pi) to accept incoming connections.
- Encryption: This is the core element. It ensures that data transmitted between devices is secure from eavesdropping.
SSH serves as the foundation for secure remote access, offering a dependable and encrypted channel for managing devices over the internet. This guide will provide the necessary steps to configure SSH on both your Raspberry Pi and Windows 10 machine, allowing you to set up a secure connection.
Prior to configuring your Raspberry Pi for remote access, it's crucial to ensure that your Windows 10 environment is appropriately set up. This involves installing essential software and configuring network settings to guarantee a seamless connection.
Steps to Prepare Your Windows 10 Machine
- Install an SSH client: Options include PuTTY, which is a popular and user-friendly choice, or the built-in OpenSSH client, which is now natively available in recent versions of Windows 10. If you choose OpenSSH, you might need to enable it in the Windows Features settings.
- Configure firewall settings to allow SSH connections: Ensure your Windows Firewall permits inbound SSH traffic. The default port for SSH is 22. You might need to create a rule to allow traffic on this port.
- Verify network connectivity and IP address settings: Confirm that your Windows 10 machine has internet access. Note down your machine's IP address, as you'll need it later. Also, ensure that you know your network's default gateway.
A well-prepared Windows 10 environment is essential for successful remote access. Make sure all the necessary tools and configurations are in place before proceeding to the subsequent steps. A little preparation here can save considerable time and frustration later.
Configuring your Raspberry Pi for remote access involves several steps, including enabling SSH, setting up a static IP address, and securing your device. This section will guide you through each step in detail, ensuring a smooth and secure setup.
Enabling SSH on Raspberry Pi
- Access the Raspberry Pi Configuration tool: You can typically access this tool through the Raspberry Pi OS graphical interface (if you have a monitor and keyboard connected) or by using SSH to connect to your Pi (if you've already enabled SSH).
- Navigate to the Interfaces tab: This tab typically contains options for enabling and configuring various hardware interfaces.
- Select "Enable" for SSH: Ensure that SSH is enabled. If it is not already enabled, toggle the setting to enable it. The system may prompt you to reboot the Raspberry Pi.
Once SSH is enabled, your Raspberry Pi will be prepared to accept remote connections. It is crucial to test the connection locally before proceeding to VPC SSH configurations to ensure that the basic SSH setup is working correctly. You can do this from another device on the same local network as the Raspberry Pi.
Setting up VPC SSH involves the integration of your Raspberry Pi with a cloud-based VPC environment. This method guarantees the security of your device while still enabling remote access, offering a secure and reliable connection.
Steps to Set Up VPC SSH
- Create a VPC in your preferred cloud provider: Sign up for an account with a cloud provider (e.g., Amazon Web Services (AWS), Google Cloud Platform (GCP), Microsoft Azure). Follow their instructions to create a VPC. This involves specifying the IP address range (CIDR block) for your VPC, setting up subnets, and configuring routing.
- Configure security groups to allow SSH traffic: Within your VPC, you will need to create security groups. These are virtual firewalls that control inbound and outbound traffic to your instances (in this case, your Raspberry Pi). Configure a security group to allow inbound TCP traffic on port 22 (the standard SSH port) from the IP address range of your Windows 10 machine (or a specific IP address if you have a static IP) or from the VPC's subnet.
- Assign a public IP address to your Raspberry Pi (or, more securely, use a private IP with a bastion host or VPN): For direct access from the internet, you will need a public IP address assigned to your Raspberry Pi within the VPC. However, this is generally not recommended for security reasons. A more secure approach involves assigning a private IP address to your Raspberry Pi within the VPC and using a bastion host (a secure server within the VPC) to SSH into your Pi or using a VPN. The bastion host will have the public IP and you'll SSH into the bastion, then SSH from the bastion to your Raspberry Pi. If you're using a VPN, you establish a secure tunnel and then access the Pi via its internal IP.
By following these steps, you can create a secure and reliable connection between your Windows 10 machine and Raspberry Pi through VPC SSH, ensuring that your devices remain protected from unauthorized access.
Security is of utmost importance when setting up remote access to your IoT devices. Prioritize these tips to bolster the security of your RemoteIoT VPC SSH Raspberry Pi setup.
Best Practices for Enhancing Security
- Use strong, unique passwords for SSH access: Avoid using easily guessable passwords. Employ a combination of uppercase and lowercase letters, numbers, and symbols. Consider using a password manager to generate and store your passwords.
- Implement two-factor authentication (2FA): 2FA adds an extra layer of security by requiring a second form of authentication, such as a code from an authenticator app or a hardware security key.
- Regularly update your Raspberry Pi's operating system and software: Keep your Raspberry Pi's software and operating system updated with the latest security patches. This helps protect against known vulnerabilities. Use the `apt update && apt upgrade` command for Debian-based systems.
- Monitor connection logs for suspicious activity: Regularly review SSH login logs (`/var/log/auth.log` on many systems) for unusual activity, such as repeated failed login attempts or logins from unexpected IP addresses. Use tools to automate this monitoring and receive alerts.
- Disable password-based authentication (use SSH keys): For maximum security, disable password authentication and use SSH keys instead. SSH keys are more secure and prevent brute-force attacks.
- Harden SSH configuration: Customize your SSH configuration file (`/etc/ssh/sshd_config`) to enhance security. Change the default SSH port (22), limit the number of allowed login attempts, and consider disabling root login.
- Use a firewall: Configure a firewall on your Raspberry Pi (e.g., `ufw` - Uncomplicated Firewall) to control inbound and outbound traffic. Only allow necessary ports (e.g., SSH on port 22) and block all others.
- Secure your VPC: Regularly review your VPC settings, security group rules, and access control lists (ACLs) to ensure they align with your security policies.
- Consider using a VPN: For an extra layer of security, consider setting up a VPN server within your VPC. This allows you to securely connect to your Raspberry Pi from anywhere in the world.
By prioritizing security, you can protect your devices and data from potential threats, ensuring the integrity and confidentiality of your IoT projects.
Even with meticulous setup, issues can arise when configuring RemoteIoT VPC SSH Raspberry Pi. This section offers solutions to prevalent problems, ensuring you can troubleshoot efficiently.
Common Issues and Solutions
- Connection Refused: This typically indicates a problem with SSH.
- Solution: Verify that SSH is enabled on your Raspberry Pi (see the instructions above). Double-check that your firewall settings (on both the Raspberry Pi and your Windows 10 machine) allow inbound SSH traffic on port 22 (or the port you've configured).
- Authentication Failed: This points to a problem with your credentials or SSH keys.
- Solution: Ensure you're using the correct username and password (or the correct SSH key). Double-check for typos. If you're using SSH keys, confirm that the public key is installed on your Raspberry Pi and that you are using the corresponding private key when connecting. Verify that the username is correct.
- Network Connectivity Issues: These can arise from incorrect IP configurations or VPC settings.
- Solution: Confirm that your Raspberry Pi has a valid IP address within the VPC's subnet. Check the routing configuration of your VPC to ensure traffic can reach your Raspberry Pi. Verify that security groups allow traffic between your Windows 10 machine and your Raspberry Pi. Ping the Raspberry Pi's IP address from your Windows machine to test connectivity. Check your VPN or bastion host setup if you are using one.
- "Host key verification failed" (when connecting for the first time): This is a security warning.
- Solution: The first time you connect, the SSH client will ask you to trust the host key. This verifies the identity of the server. If you are sure you trust the server (your Raspberry Pi), you can usually accept the host key. This adds the key to your `known_hosts` file. Make sure you are connecting to the correct IP address or domain name.
- Port Forwarding Issues: When using a router, ensure port forwarding is configured correctly.
- Solution: If you are connecting to your Raspberry Pi from outside your local network, you will need to configure port forwarding on your router. Forward port 22 (or your configured SSH port) to the internal IP address of your Raspberry Pi.
Troubleshooting effectively demands a systematic approach. Applying the tips provided will enable you to resolve issues quickly and efficiently, ensuring a smooth and secure remote access experience.
- Remote Iot Management Software Top Examples Benefits Guide
- Unveiling Sydni Kuechly The Woman Behind Nfl Star Luke Kuechly